Create dataverse application
create-dataverse-app is a command line tool that helps you create a Dataverse application,
register it to dapp table and define the data models you want to use in your app. It also comes
with a React demo(/src/App.tsx) and React Hooks(/src/hooks/) SDK to show how to publish web3 social posts on DataverseOS.
You can modify this demo and develop your application under this framework.
If you want to use other frameworks like next.js or vue.js,
you can use this tool to deploy your customized data models and create your app first and then get the model ids.
After that you can install dataverse-connector in your project and use the registered app name and model ids to access the data resources.
requirements:
- Git (opens in a new tab)
- nodejs (opens in a new tab) >= 16
- pnpm (opens in a new tab) >= 6
npm install -g pnpm - Dataverse Wallet (opens in a new tab) - the wallet extension needs to be installed in your browser.
Step 1: Init framework
In terminal, run
npx create-dataverse-app <APP_NAME>the output should be like
Creating a new Dataverse app in /home/my-app.

Done!

To get started, run:

cd my-app

pnpm install

pnpm dev
Step 2: Configure your app
Open the project created in the previous step. The project structure should be like
.
├── LICENSE
├── README.md
├── dataverse.config.ts // config your app basic information here
├── index.html
├── logo.svg
├── models  // data models pre-defined here
│   ├── fs  // file system data models
│   ├── post.graphql   // post data model, an example as a post of web3 social app
│   └── profile.graphql // profile data model, an example as user profile of web3 social
├── output
│   └── app.json    // generated after app creation, contains app information
├── package.json
├── scripts // tools to help you create your app and manage
│   ├── createDapp.ts
│   ├── tool.ts
│   └── types.ts
├── src // demo source code
│   ├── App.css
│   ├── App.tsx
│   ├── hooks   // React Hooks SDK of DataverseOS
│   ├── index.css
│   ├── main.tsx
│   ├── types.ts
│   └── utils.ts
├── tsconfig.json
├── tsconfig.node.json
└── vite.config.ts
Open dataverse.config.ts, you can config your app basic information here.
export const config = {
  slug: '', // app id, need to match this regular: `^[a-zA-Z][a-zA-Z0-9_]*$`
  name: '', // app name should NOT contain "-"
  logo: '',
  website: '', // you can use localhost:(port) for testing
  defaultFolderName: 'Untitled',
  description: '',
  models: [
    {
      isPublicDomain: false, // default is false
      schemaName: 'post.graphql',
      encryptable: ['text', 'images', 'videos'], // strings within the schema and within the array represent fields that may be encrypted, while fields within the schema but not within the array represent fields that will definitely not be encrypted
    },
    {
      isPublicDomain: true,
      schemaName: 'profile.graphql',
    },
  ],
  ceramicUrl: null, // leave null to use dataverse test Ceramic node. Set to {Your Ceramic node Url} for mainnet, should start with "https://".
};
You can config your app slug(as a unique identifier), name, logo image URL, description,
models, etc. here. For development and testing, you may set the website to 'localhost'.
For production usage, you should set the website to your app's domain name. The defaultFolderName
is the default folder path when user creates data under your app.
The models is the data models to use in your app. You can define your own data models in the models folder.
For more info about data models, please refer to Step 3.
isPublicDomain specifies whether the data model can be used by other apps. If you set it to true, other developers
can use your data model in their apps. If you set it to false, other developers can NOT use your data model, only
your app can use it and access the data resources under this model.
schemaName refers to the data model file name under models folder. For example, if you want to use the post model,
schemaName should be post.graphql.
The encryptable is an array used to specify which fields in the data model can be encrypted. Fields not in the encryptable list
will always be open and can be accessed by anyone. Fields in the encryptable list can be encrypted by the app developers.
For example, if you set encryptable to ['text', 'images', 'videos'], the text, images and videos fields in the post model
can be encrypted by the app developers. They are not necessarily encrypted, but can be encrypted if the app developers want to.
Meanwhile, the fields not in the encryptable array will always be open and can be accessed by anyone.
Note that if a model is configured as isPublicDomain: true, the
encryptable field will be ignored, because the whole model is public and
thus all fields need to be open. And if a model is configured as
isPublicDomain: false, the encryptable field is required. if you don't
want to encrypt any fields, you can set encryptable to an empty array [].
The ceramicUrl is the Ceramic node url to use. If you leave it null, the app will use the test Ceramic node
provided by dataverseos.
Note that the test ceramic node of DataverseOS is just for developing and testing, and the data on it will be cleared regularly. So you should use your own Ceramic node for production usage. And DON'T put any important data on test node.
Step 3: Customize data models
A data model is a conceptual representation of the data structure that will be used under your app.
For example, if you are building a blog app, you might have a blog model that represents a blog article.
If you are building a social network, you might have a profile model that represents a user profile.
Data models should be defined in a GraphQL schema file. For example, we define a post model in post.graphql:
type post @createModel(accountRelation: LIST, description: "post") {
  author: DID! @documentAccount # DID of the user who created this post
  version: CommitID! @documentVersion
  appVersion: String! @string(maxLength: 100)
  text: String @string(maxLength: 300000000) # text content of the post
  images: [String] @list(maxLength: 10000000) @string(maxLength: 2000000) # images of the post
  videos: [String] @list(maxLength: 10000000) @string(maxLength: 2000000) # videos of the post
  options: String @string(maxLength: 300000000)
  createdAt: DateTime! # time when the post is created
  updatedAt: DateTime! # time when the post is updated
}
This represents a post of a web3 social app. A post may contain text, images, and video content.
The @createModel directive is used to tell dataverseos to create a data model for this type.
The @documentAccount directive is used to tell dataverseos to create a DID for this type.
The @documentVersion directive is used to tell dataverseos to create a version for this type.
profile and post are here to demonstrate how to define a data model.
You can define your own data models under models folder.
For example, if you want to add comments to the post, you can modify the post.graphql like this:
type post @createModel(accountRelation: LIST, description: "post") {
  author: DID! @documentAccount
  version: CommitID! @documentVersion
  appVersion: String! @string(maxLength: 100)
  text: String @string(maxLength: 300000000)
  images: [String] @list(maxLength: 10000000) @string(maxLength: 2000000)
  videos: [String] @list(maxLength: 10000000) @string(maxLength: 2000000)
  options: String @string(maxLength: 300000000)
  createdAt: DateTime!
  updatedAt: DateTime!
  comments: [String] @list(maxLength: 10000000) @string(maxLength: 2000000)
}
Here is another example for a blog model:
type blog @createModel(accountRelation: LIST, description: "post") {
  author: DID! @documentAccount
  version: CommitID! @documentVersion
  title: String @string(maxLength: 100)
  content: String @string(maxLength: 300000000)
  createdAt: DateTime!
  updatedAt: DateTime!
}
author and version are required fields for all data models.author is the DID of the user who created the data.
version is used to maintain the update history of the data. These 2 fields will be used by DataverseOS. You should NOT modify them and do NOT
need to set them manually when create a stream.
Data models define the important data types in an application. You can use the data models to create data streams and access the data resources.
Creating a data stream under the corresponding model means creating a structured data in the application. For example, creating a data stream using the createIndexFile method under the post model means publishing a tweet on a social network.
Models under fs folder are special models. They are used by DataverseOS to
fulfill the encrypted file system. You should NOT modify or delete them.
Step 4: Register your app to dapp table
Before running your app, you need to fill in your private key in .env file.
The private key will be used to sign messages and manage your app as your authorization.
You should keep the key safe as if it is leaked, your app may be stolen.
if you are using self-hosted ceramic node, you should use the private key of the adminDID of your ceramic node.
if you are using test ceramic node, you can use any private key here. We highly recommend you to use
a new private key for testing. You can generate a new private key by running
git clone https://github.com/hypotyposis/pk-tools
cd pk-tools && npm install && node generate_eth_accounts.js
or use docker:
docker run hypotyposis/pk-tools- Install dependencies
pnpm install- deploy your app
pnpm create-dataverse-appThis command will deploy your app to dataverseos testnet and register your app to dapp table. If successfully, you will see the following output:
Create successfully, now you can run 'pnpm dev' to run react demo.And the details of your app deployment will be printed out to /output/app.json.
An example here:
{
  "createDapp": {
    "id": "0a008b3b-2c05-4d1b-bec4-646c787a9fce",
    "streamIDs": [
      {
        "name": "zooey001_indexFolders",
        "stream_id": "kjzl6hvfrbw6c75ohahxc0qmw1v55zskmxwbd8qa5in63tzo3efuaqn05wmdazv",
        "isPublicDomain": false,
        "encryptable": null
      },
      {
        "name": "zooey001_indexFiles",
        "stream_id": "kjzl6hvfrbw6c8nnqc8ah69t1fgdaaxceu72jp60t6wtz1y81e24qhk840bh2j6",
        "isPublicDomain": false,
        "encryptable": null
      },
      {
        "name": "zooey001_post",
        "stream_id": "kjzl6hvfrbw6c9vun6w8ajmfvwjfm2t6uh98o76haq5yg5z3jz47v3h0uyhym6l",
        "isPublicDomain": false,
        "encryptable": ["text", "images", "videos"]
      },
      {
        "name": "zooey001_profile",
        "stream_id": "kjzl6hvfrbw6c5gn98hiwma8g4qafhb0gf149l0l06rg7f6yhf1sq8l6xxe54od",
        "isPublicDomain": true,
        "encryptable": null
      },
      {
        "name": "zooey001_contentFolders",
        "stream_id": "kjzl6hvfrbw6c71b0vrr4rpg84mqcty530ycz3yfygndksybertu5cgethwtx94",
        "isPublicDomain": false,
        "encryptable": null
      }
    ],
    "website": "http://localhost:3000",
    "name": "zooey001",
    "slug": "zooey001",
    "logo": "https://venerable-queijadas-290c8d.netlify.app/logo.png",
    "description": "A simple social media app",
    "defaultFolderName": "Untitled",
    "ceramic": "https://local1.dataverseceramicdaemon.com"
  }
}
Once the models are deployed, you will get the stream_id of each model. You can use the stream_id as the identifier of the models and
use them in your app later.
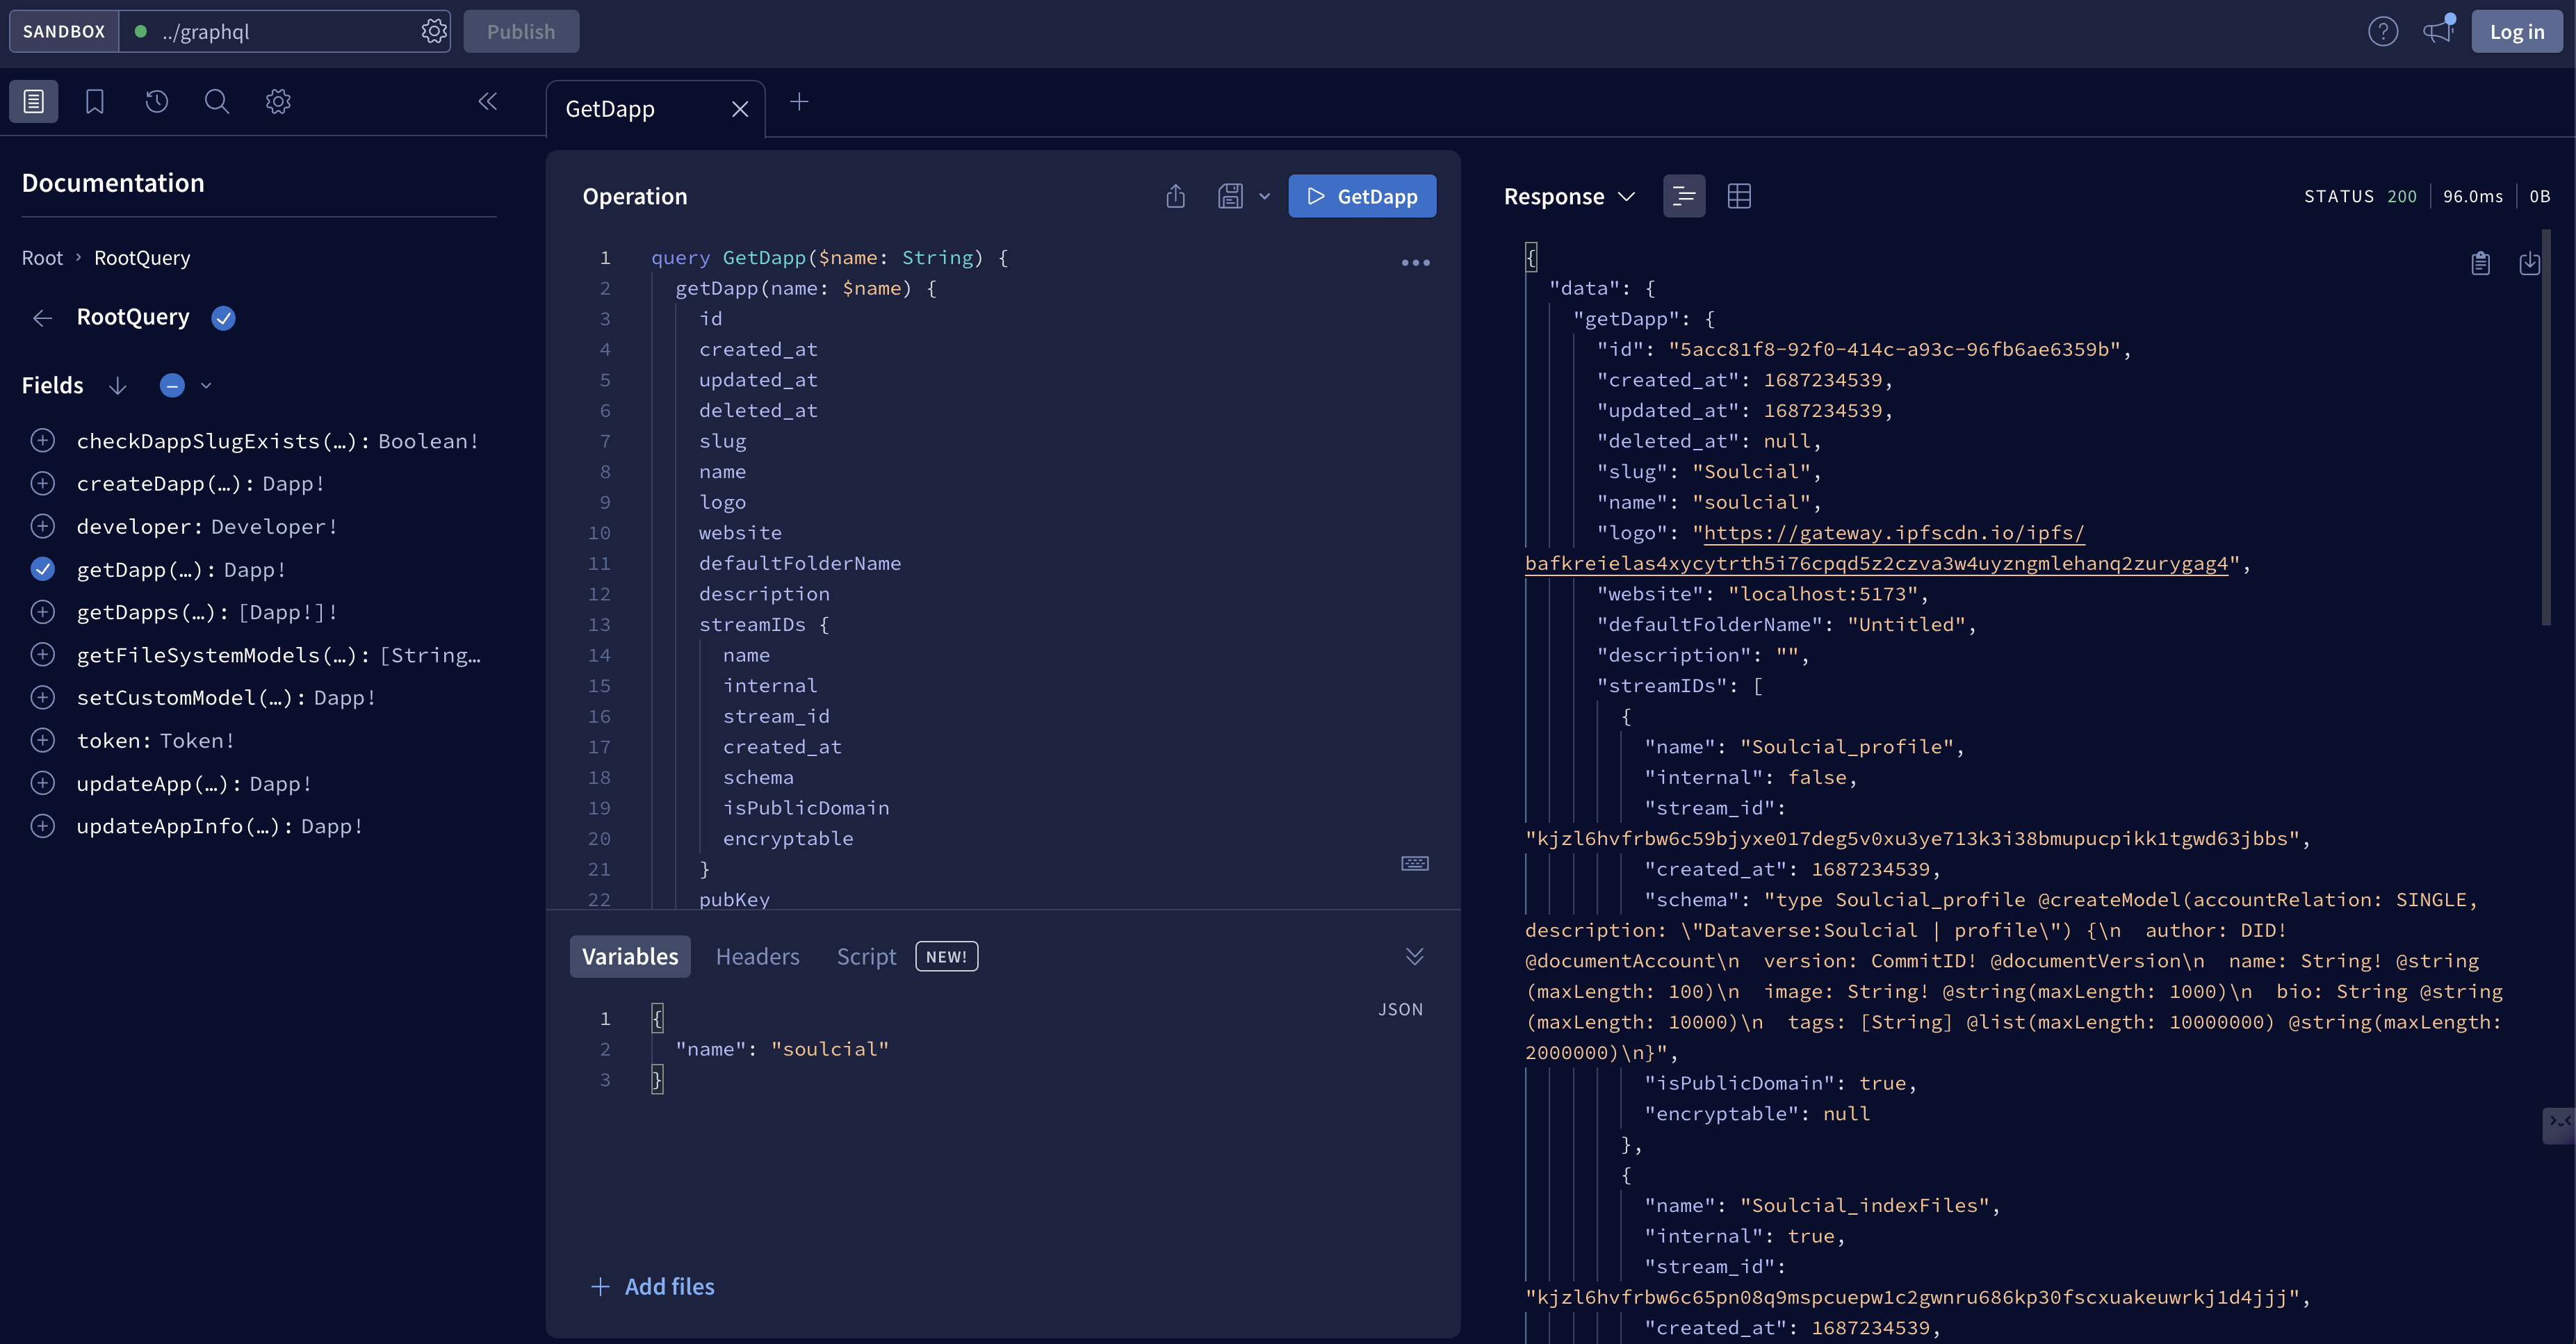
For more information like the schema of each model, you can visit graphql panel (opens in a new tab)
and use the getDapp query to get the details of your app.
Step 5: Run your app
pnpm devThe demo should start at http://localhost:5173. This demo shows some basic functions of dataverseos.
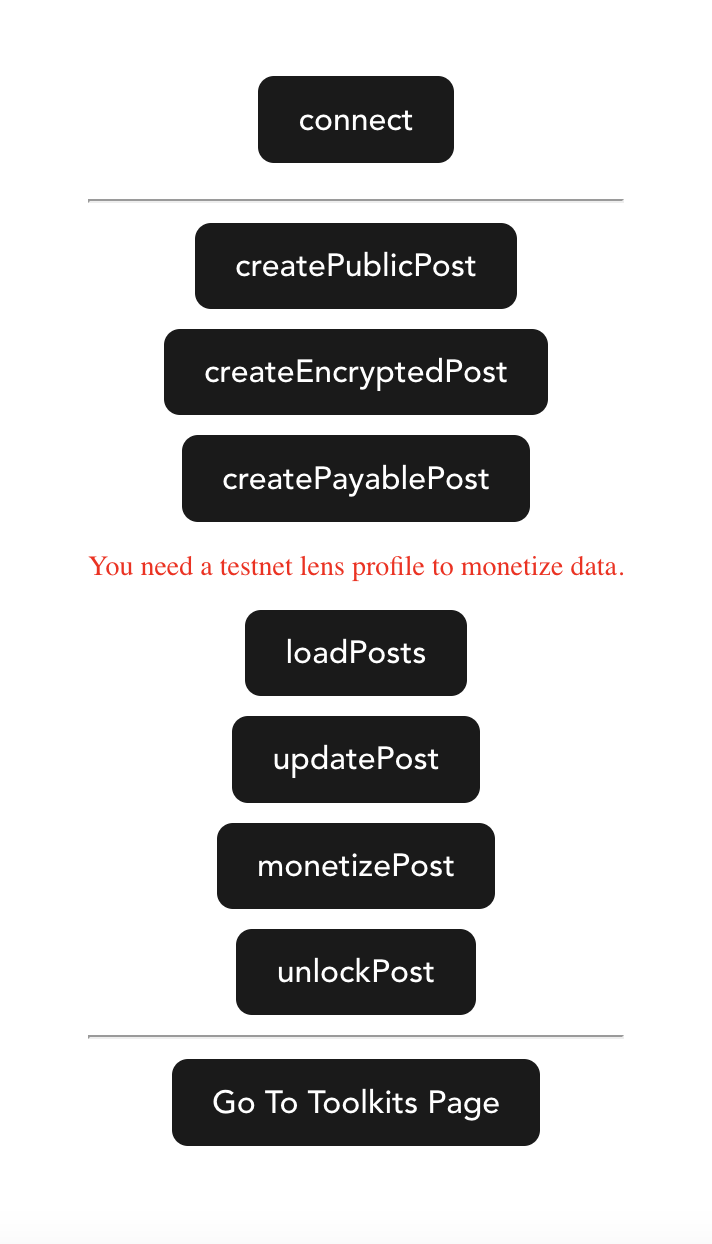
Welcome to have a try!
Step 6: Build your app in another framework [optional]
create-dataverse-app is a framework to help you create a dataverse app, register it to dapp table and
define the data models you want to use in your app. We also provide a React demo(/src/App.tsx) and React Hooks(/src/hooks/)
SDK within this framework as en example to show how to build a web3 social app with dataverseos. You can use this demo
as a reference to build your own app.
Meanwhile, if you want to use other frameworks to build your app, you can also do that.
Just install dataverse-connector package and use it in your app.
You can use the data models you defined in models folder and the stream_id of each model to access the data resources.
And use the app name in functions like createCapability and checkCapability.